Share Article:
Cleaning may be required at times to remove debris, excess wax or when there is an infection. If you are uncertain about the need to clean, please consult your veterinarian.
Signs of ear infection:
– Excessive scratching or rubbing of ears
– Shaking or tilting head constantly
– Foul odour
– Redness, inflammation, swelling and discharge
– Sensitive and painful when touched
Ear cleaning supplies:
– Cotton balls
– Ear cleaning solution that does not contain alcohol
– Treats to make ear cleaning a positive experience
– A towel to burrito small dogs or cats if necessary
Process:
- Find a quiet and calm environment with minimal distraction. You can have someone to help if your pet is squirmy.
- Place soaked cotton balls in the ear canal. Ensure that the balls are small enough to fit yet large enough to be taken out easily. Bigger is always better!
- Massage the base of the ear for 10 – 20 seconds gently to loosen dirt.
- Remove the cotton ball and repeat with a freshly soaked one until ear is clean.
- Put in dry cotton balls to soak up excess fluid.
- Clean the external ear with soaked cotton pads/gauze/balls.
- Repeat steps on the other ear.
Offer rewards such as treats or praises before, during, and after the procedure. Speak in a calm and reassuring manner to your pets to ease their nerves.
Gradual desensitization is recommended for pets that are highly reactive to ear cleaning. Start by gently touching and massaging their ears until they are accustomed to it. Then move on to introducing the supplies needed for ear cleaning. Slowly progress to applying ear cleaning solution on ear flaps while rewarding your pet. Patience is key!
Why should we not put in Q tips?
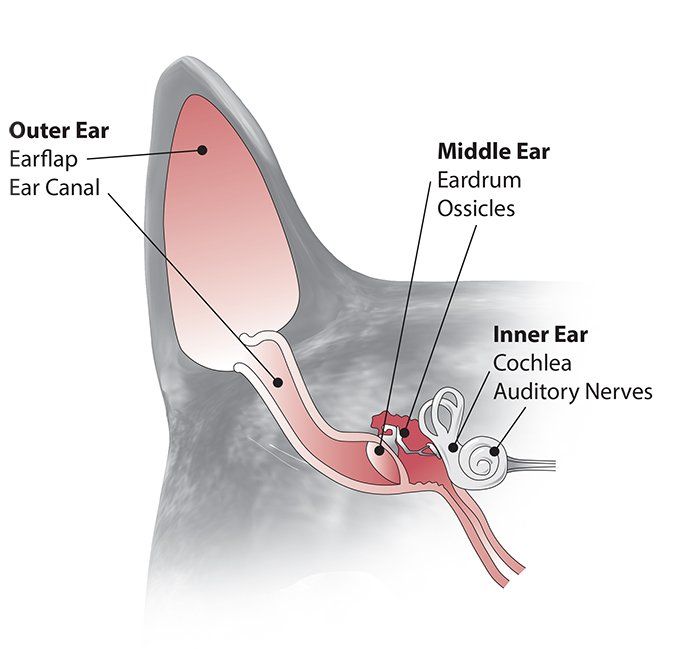
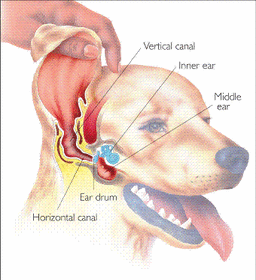
Their ear canals are “L” shaped and putting in a Q tip blindly could push ear wax down further into the canal. Also, the cotton tip could fall into the ear canal.
Anatomy of cat and dog ear


You might be interested

